Homemade Limoncello A Step-by-Step Guide
This article describes how to make the perfect Homemade Limoncello.
What is Limoncello?
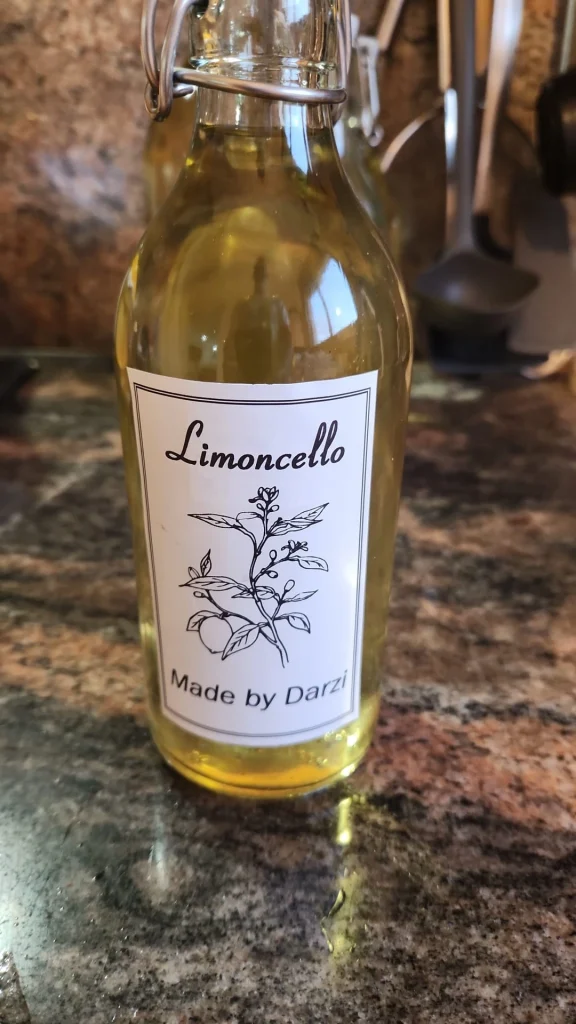
Homemade Limoncello, for those who don’t know, is an Italian lemon liqueur with a bright and phosphorescent yellow color. The liqueur comes mainly from the region of Campania and Sorrento, in the south of the country. This area is known for the good lemons that grow there and are the raw material for making this liqueur.
Homemade Limoncello is usually served at the end of the meal as an appetizer and is served very cold in small glasses. The locals in the Amalfi region even make it bigger and refrigerate the glasses before pouring.
It is not clear how limoncello was born and there are several legends and anecdotes surrounding this question. Some claim it was invented in the early 20th century by some Italian mama. Who tended a lemon garden and sold the yellow liqueur at her son’s well. Some say that the liqueur is older and was used by fishermen who went out to sea at dawn to fight the cold. And there are the numbers that the liqueur was developed by monks, as a nice way to pass the time between prayers. But what does it matter, as long as there is a cold limoncello? a balcony with a sea view, and good music in the background.
Making Homemade Limoncello is an overall simple job that doesn’t require much effort. But it takes a long time. The good news is that during this time you don’t have to do anything but let the alcohol and lemons do their thing. Now is a great time to start making limoncello both because the lemons are excellent and full of smell and flavor. And because your limoncello will be ready for summer – and there is no better season than summer for a limoncello.
So how do you make Homemade Limoncello?
Limoncello is not made from the lemons themselves but from their peels. Soak the peels in alcohol and after it crystallizes and absorbs all the lemon flavors from the peels, add sugar syrup and let the liqueur crystallize. In the end, the resulting limoncello is filtered, bottled, and sent to the freezer. Before we start the work of preparation, some important principles.
Choose your lemons
Don’t get me wrong, we are not fans of organic food. Not that we have anything against it, but we don’t eat only organic. However, when it comes to making Homemade Limoncello, there are very good reasons to choose organic lemons. Since the peel of the lemons is used, it is important that it be as clean as possible, and organic lemons, those that have not been sprayed with various chemicals, are simply cleaner. It is true that in any case wash the lemons well, but it is still better to play it safe. If you have access to a lemon tree or can take one from a friend like us, that’s the best.
By the way – if you buy lemons in the supermarket, note that they may be covered in dong. This is a method to preserve the lemons for a long time: cover them with a thin layer of dong and refrigerate them. This way the lemons stay fresh all year round and are sent to the stores in drops. It doesn’t matter so much if you only use the inside of the lemon, but in limoncello, it’s a problem.
The second important principle in making Homemade Limoncello is the correct peeling of the lemons, and more on that later.
Gather the Ingredients Needed to Make Limoncello
Ingredients for the first stage
14-15 lemons
One and a half liters of alcohol with a concentration of 96 percent [you can combine pure alcohol with vodka, see below]
Ingredients for the second stage
3.5 cups of sugar
5 glasses of water
A large glass jar that can be tightly sealed, sterilized
It turns out that plastic and alcohol may undergo a chemical reaction that breaks down the plastic and apparently, this is what creates the layer (which was not created in the glass bottle). That’s why we recommend using only glassware (and sterilizing them before use).
The preparation of limoncello, as mentioned, is divided into two stages.
Before starting the peeling, it is important to clean the lemons well (even if they are organic). You can use a kitchen brush and scrub the lemons with a little soap. It is important to wash them with soap and dry them well before peeling.
When peeling lemons for limoncello, you must be very careful to peel only the yellow, outer skin of the lemon. It is very, very important not to let the white peel get in because it is very bitter, and the bitter taste may overpower the limoncello.
So how do you peel lemons so gently? There are several methods and schools of thought that differ from them very simply in the peeling tool. Because we’re nice, we got our hands dirty and tested the four main methods so we can tell you which one is best.
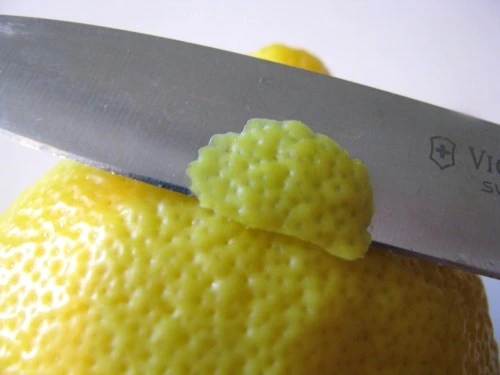
Cutting with a knife
You can use a small, sharp knife to gently peel the outer skin, like how you peel an apple. As you can see in the picture, this method can achieve good results, but you must work carefully so as not to reach the white layer (or cut your finger), and peeling with this method takes a long time. It’s not bad if you peel two or three lemons, but more than that? Not worth the effort.
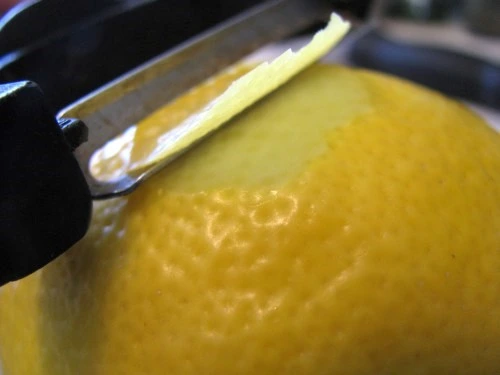
Vegetable peeler
Peeling with a vegetable peeler is one of the most common methods, according to what we’ve seen online, and it makes sense. With a good sharp peeler, you can peel long strips of peel and then you don’t have to deal with small pieces (which make it difficult to filter the final product). It also takes less time than peeling with a knife, but you need to use a good, sharp peeler.
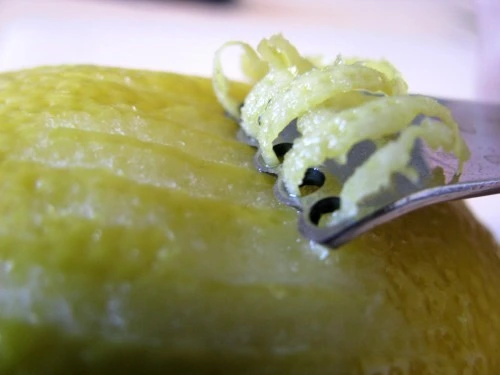
Using a zester
A zester is a small device designed precisely for the operation of peeling the outer skin (called Zest) from citrus fruits. Using a zester gave short, curly strips and did a good job overall, but scraping the peel with a zester is more useful when you need a little peel (as a spice for making a cake, for example) rather than when you need to peel many lemons.
Micro plane grater
The fourth way to peel the lemon is to use a good grater. You can use the ones that stand (and then you must choose the hard and dense teeth) or the ones that contain one type of teeth. In any case, it is recommended to work with them carefully so as not to injure the white shell. We use a micro plane scraper that you can see here in the picture. In general, we recommend every cook or baker to use it because it does a perfect job when it comes to grinding a lot of raw materials, hard and soft. It is excellent for grating parmesan over pasta, grating nutmeg, and for delicately peeling citrus fruits. It is true that it is a little expensive, but it is worth every cent.
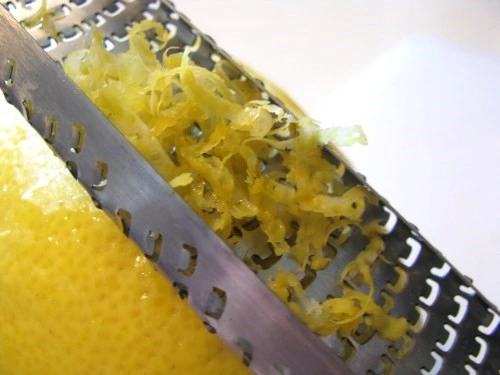
When it comes to limoncello, this is the best method in my opinion because it allows very fast peeling of the lemons without compromising the quality of the work. You just have to make sure to move the peel in long but gentle movements (you hardly need to apply pressure, unlike with the zester, for example). We peeled 15 lemons in a little over half an hour.
How to Prepare & Infuse the Lemon-Vodka Mix
Now that you’ve peeled the yellow skin off all the lemons, it’s time to open the alcohol. Regarding alcohol, there are two schools of thought, or two and a half actually. One school is the one that uses pure alcohol, another school uses vodka, and the two-and-a-half school is like the UN – it doesn’t choose a side and uses both.
The choice here is yours, of course. We chose to use vodka.
If you use vodka, choose a good vodka but you really don’t have to go for a premium product (on the other hand, we wouldn’t go for cheap vodka). Also, choose vodka with a high alcohol content. That way it will taste less like vodka. The high alcohol content is also important to prevent the limoncello from turning into ice. The ratio between the vodka and the pure alcohol should be half and half (so if you follow our quantity, you need 750 ml of vodka and 750 ml of alcohol). Keep in mind that vodka will contribute to limoncello, but probably in moderation, because it is still diluted with more alcohol and then with sugar syrup.
Put the lemon peels in a sterilized jar, pour in the alcohol, mix gently and that’s it. You have completed the first step. Stick a note on the jar with the date so that you remember when you started the preparation and keep it in a shady and cool place. Open the diary, count 45 days ahead, and mark the date. This is the day when we will return to the jar and proceed to the second step in making homemade limoncello.
Homemade limoncello – last part
The summer days have finally arrived and with them the heat and humidity. This is an excellent time to finish making the limoncello we started almost three months ago (!) and finally enjoy a good, cold lemon liqueur.
reminder. Three months ago, we received lemons from our good friend’s tree, and they were used, among other things, to make limoncello. In the first part we explained about peeling the lemons and soaking the peel in alcohol and in the second part, a month and a half later, we added sugar syrup. Now enough time has passed, and you can proceed to the last step – filtering the limoncello and bottling it.
Strain the limoncello
Actually, our limoncello is already ready, but it is important to filter it because it is full of small pieces of lemon peels that make it less pleasant to drink. There are several ways to strain the limoncello and it is important to use a strainer as fine as possible, to get a final liquid that is as clear as possible (this is especially true when peeling the lemons is done with a good grater like a micro plane which creates small particles).
You can filter the limoncello using a thin diaper cloth, cheesecloth, or even a clean sheet. Another good way, which we used, is coffee filters, which are very fine filters and therefore provide good filtration. All you have to do is line a funnel with filters and place it over a clean glass, pour some limoncello, and wait.
This step takes time, so make sure to do it when you are free and at home. You don’t have to watch the limoncello while it slowly flows through the filter, but just occasionally come and pour a little more limoncello into the funnel. From time to time the filter will clog, and you will have to clean it or replace it with another one (that’s why the use of coffee filters, which are disposable, is particularly convenient).
Bottle your Limoncello
After you finish filtering the limoncello, you can bottle it. Just place the funnel inside the mouth of the bottle and pour the limoncello through a new filter. This will take time, again, but the goal is to get as clear a liqueur as possible.
The limoncello should be bright yellow and clear. Its texture is a bit thick, thanks to the sugar that enters in the second step. In fact, at this point the liqueur is ready, but you should put the bottles in the freezer for a few days before you start drinking to let the flavors stabilize.
Limoncello is usually drunk very cold, so you should keep at least one bottle in the freezer at any given moment. Since the liqueur contains a high percentage of alcohol, it should not freeze. If you see that the liquid is freezing, be careful that it does not explode the bottle. In that case, you might want to keep it in the fridge and serve it with a little ice (or in frozen glasses). This is a very strong liqueur, which the Italians like to drink at the end of the meal from small glasses. You can of course use the liqueur in other forms such as making lemon pie or cakes. Another way we really like is to drizzle some limoncello on real vanilla ice cream.
Salut and visit our blog for more Homemade recipes.